Call Us Toll Free: 1-800-827-8953
Close
(0)
You have no items in your shopping cart.
Search
Filters
RSS

Blog posts tagged with 'products in action'

Can you Remove Candle Wax from Spandex Tablecovers without Staining?

Candle wax is something that party rental companies that rent out event tablecloths have to deal with on an ongoing basis. Candles and tea/votive lights are an event staple that adds great ambiance to the event – but can be a huge pain to remove – and can potentially stain. We had a customer let us know our spandex cocktail tablecovers had been stained by candle wax so I thought I would test to see whether I could remove the candle wax from spandex tablecovers without staining. Here are the steps I took below:

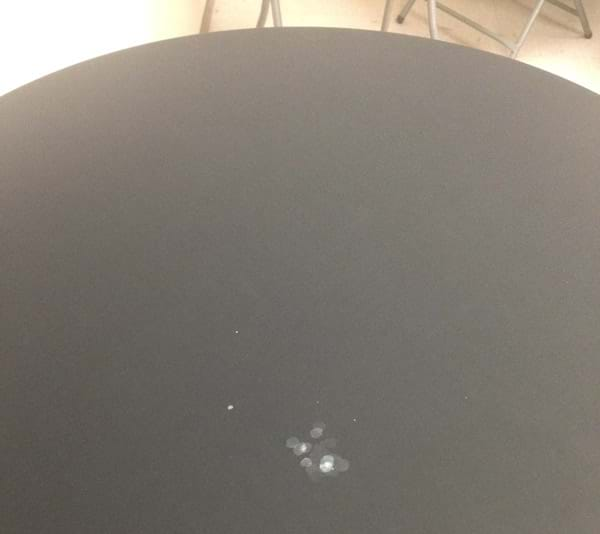
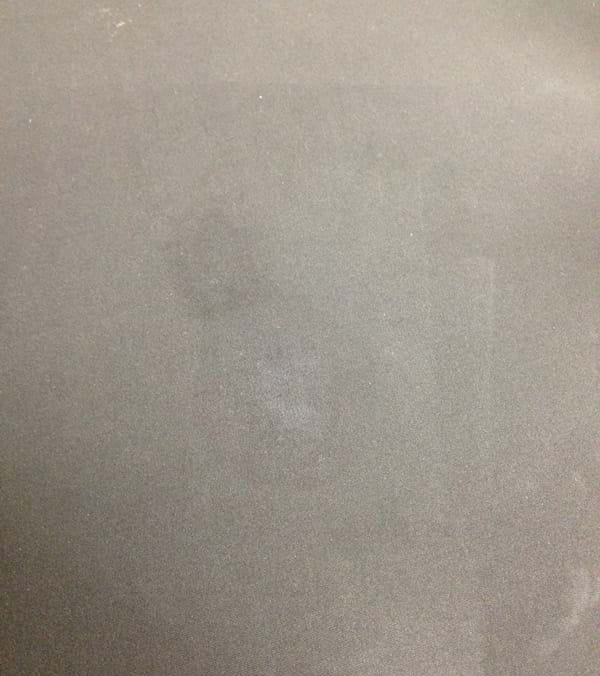
Before Picture of Candle Wax on Spandex Cocktail Tablecover

Candle Wax on Spandex Tablecover

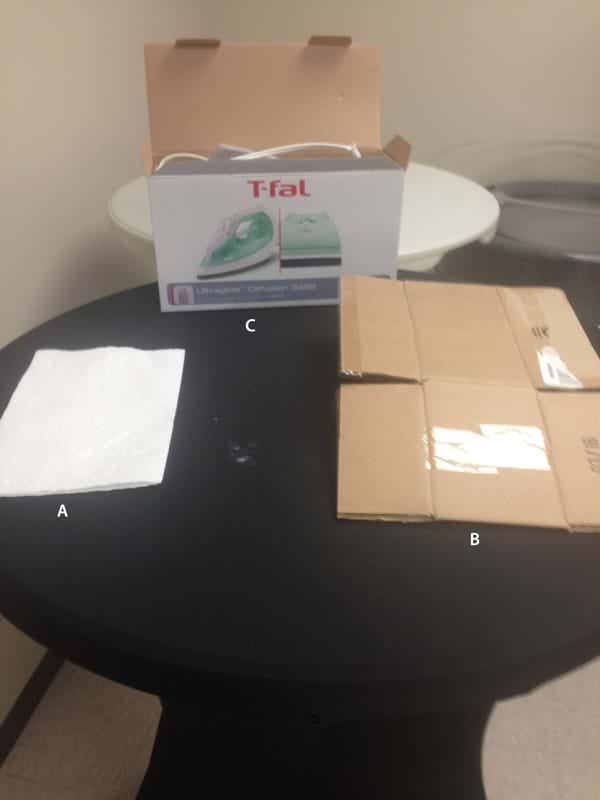
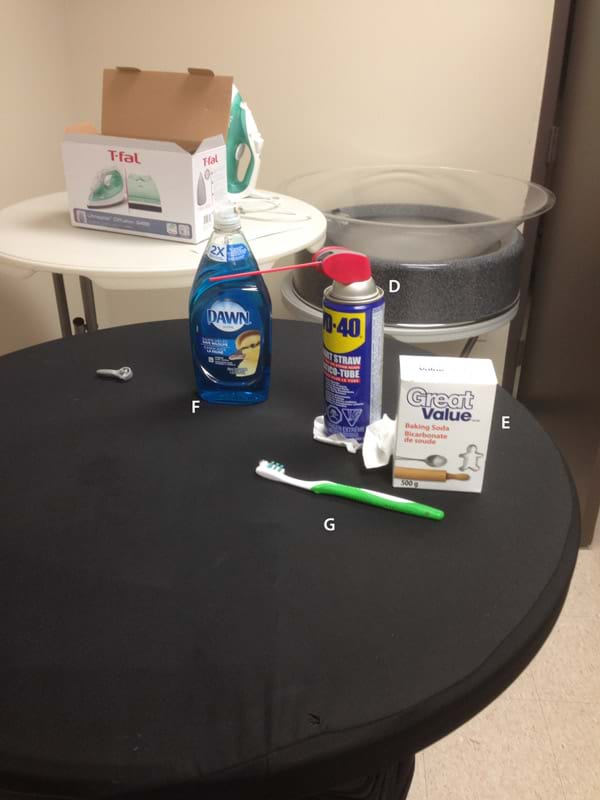
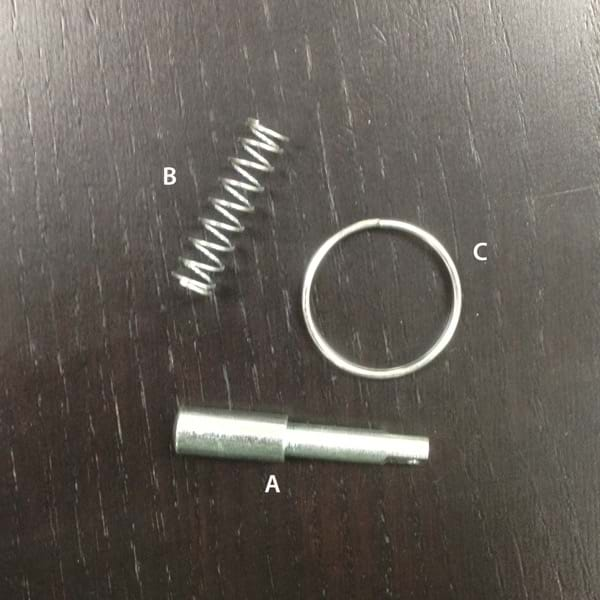
Here are the items you will need to remove the candle wax:

  • A–Paper Towel
  • B–Cardboard
  • C–Iron with multiple temperature settings
  • D–WD-40
  • E–Baking Soda
  • F–Dawn
  • G–Toothbrush

Tools to get wax out of Spandex Part 1Tools for Removing Wax from Spandex Part 2

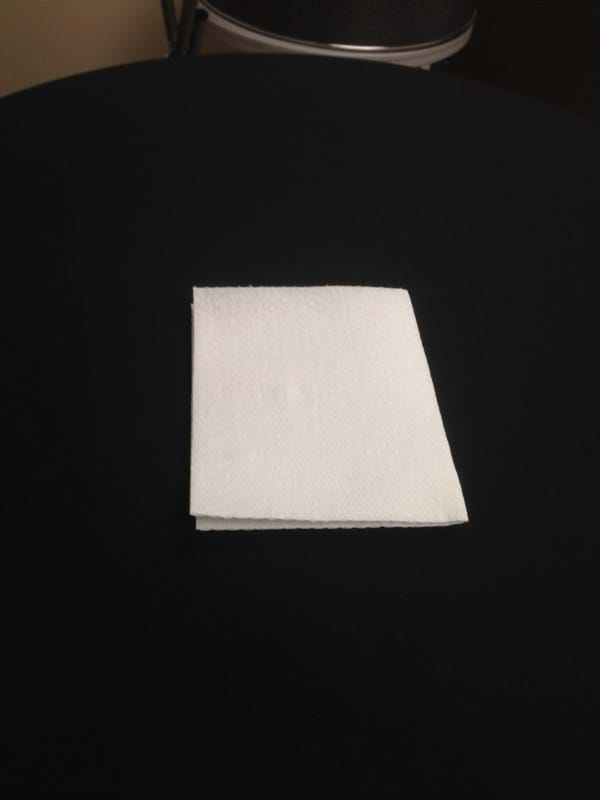
Place the cardboard and a piece of paper towel under the stain between the table and the fabric

Cardboard and Paper Towel under Spandex Table Cover

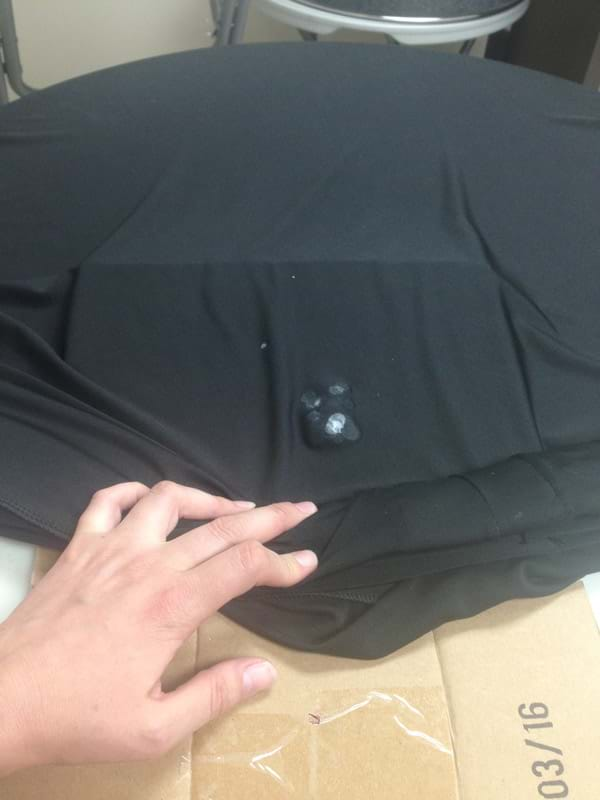
Place a piece of paper towel on top of the fabric

Paper Towel on Top of Candle Wax

Heat iron on low-medium setting and then press the iron on top of the paper towel. The wax will reheat and melt into the paper towel.

Iron on Top of Paper Towel to get Wax Off

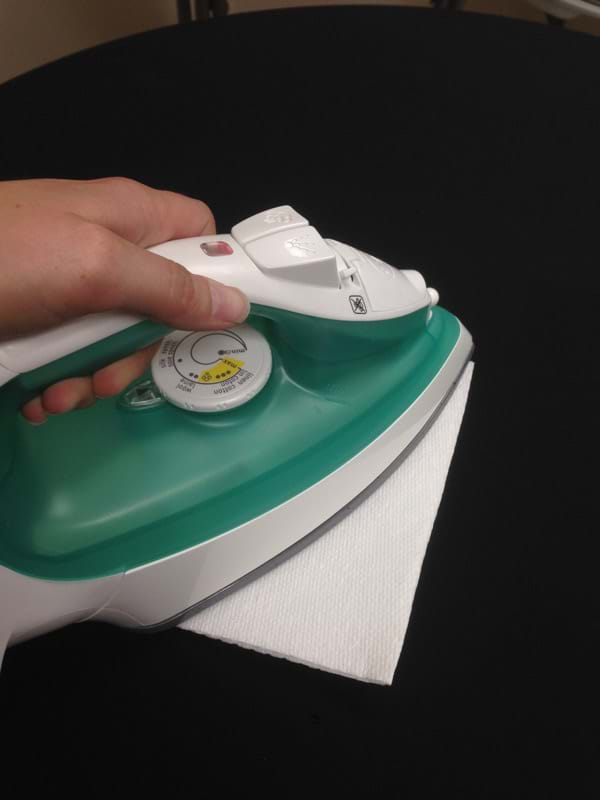
Here’s what it will look like after the wax has been melted into the paper towel – like you have an oil stain now.

Wax Removed from Spandex Table CoverPaper Towels with Wax on Them

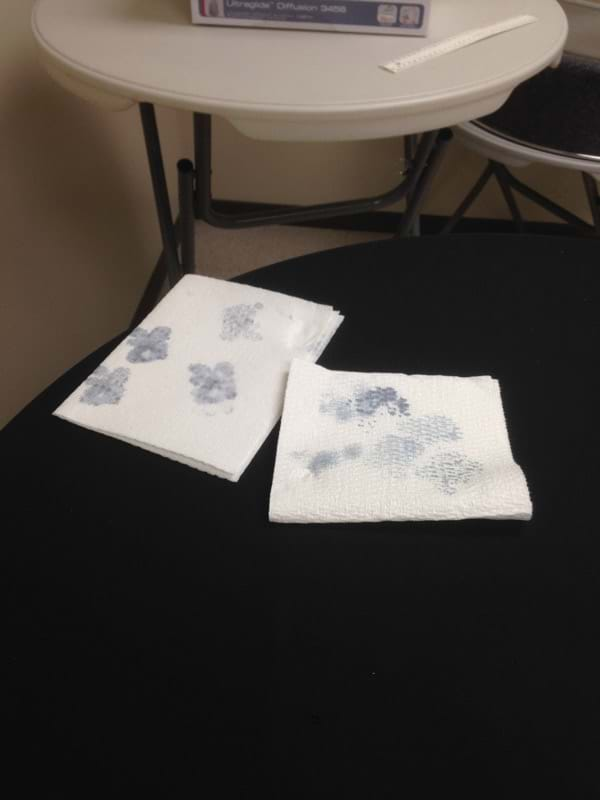
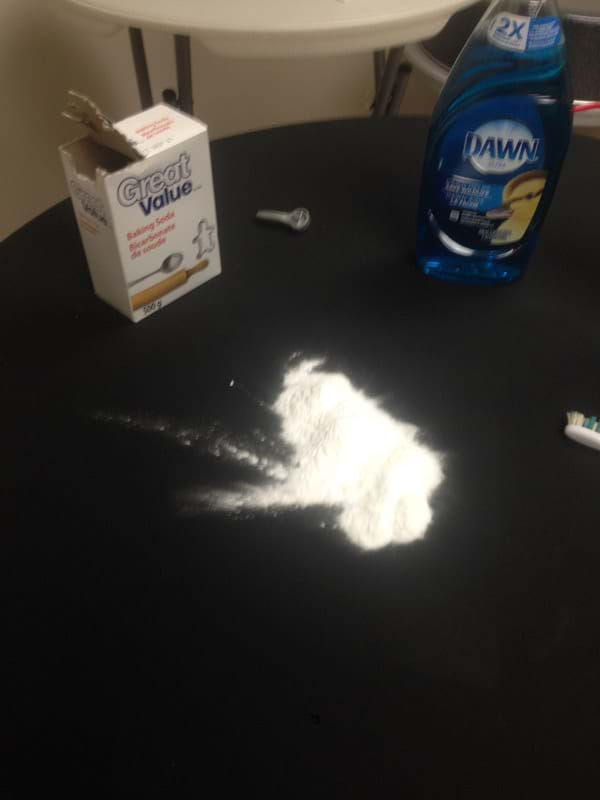
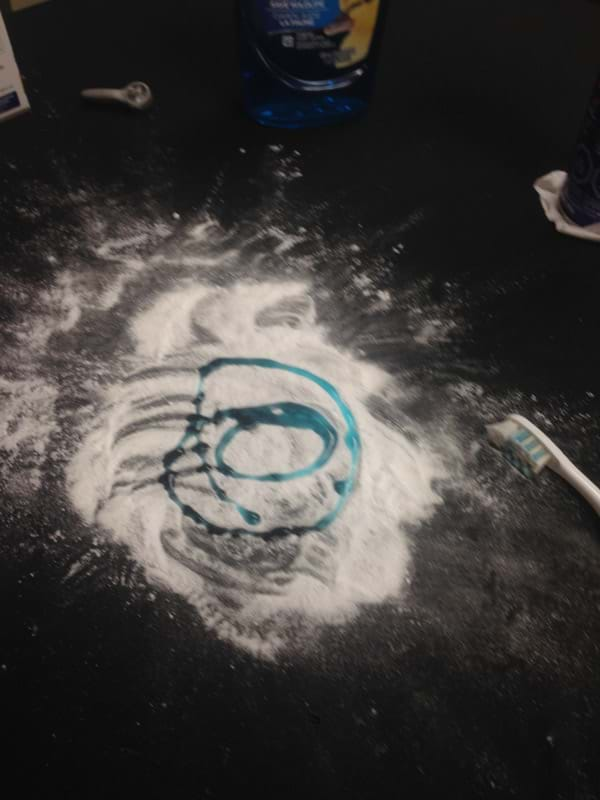
Squirt WD-40 onto the oil stain. If it is a small amount of candle wax, you may prefer to put a little WD-40 into a bowl and use a q-tip to put WD-40 onto the stain.

WD40 on the Stain

Sprinkle a liberal amount of baking soda onto the WD-40.

Baking Soda Poured on the Stain

Use the toothbrush to brush the baking soda into the stain. You will notice it clumping as it pulls up the WD-40 into the baking soda. Once it has clumped, discard the used baking soda.

Clumping Baking Soda from Oil Stain

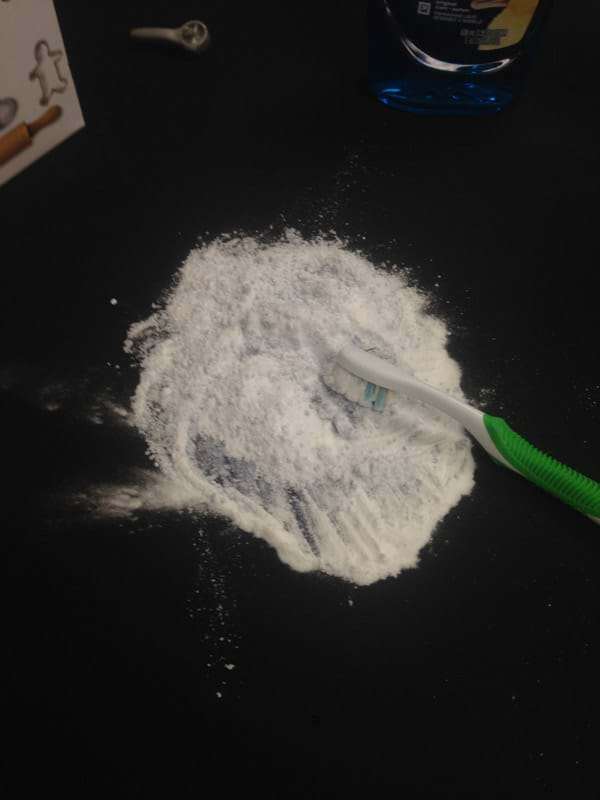
Keep sprinkling on baking soda and brushing it until there are no more clumps.

No More Clumps from Oil and Baking Soda

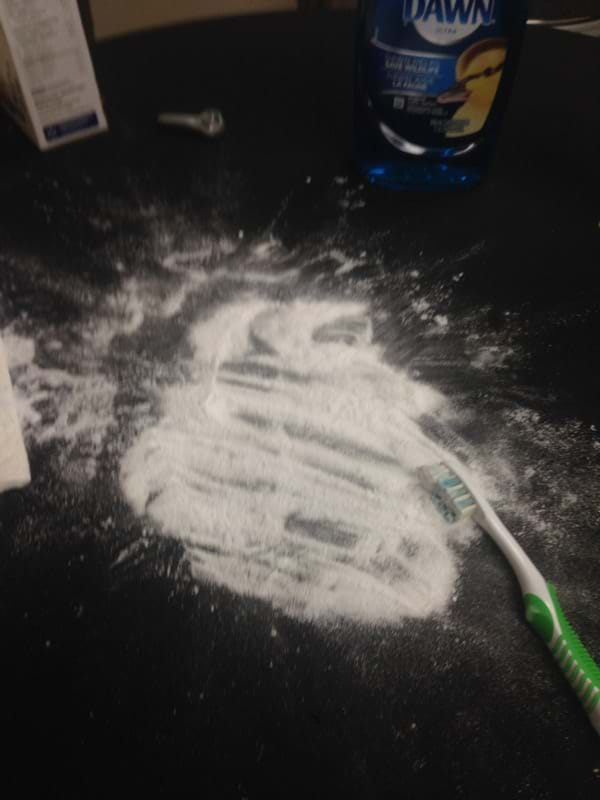
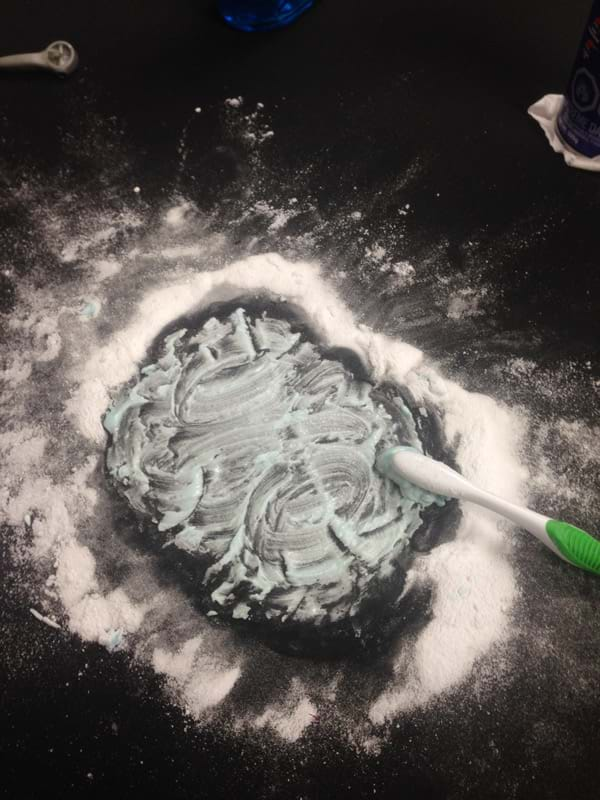
Put Dawn on the baking soda and use the toothbrush to rub it in. Then let it sit for a bit to pre-treat.

Dawn on Baking Soda and StainRub in Dawn and Baking Soda

Throw the spandex tablecover with baking soda and dawn into the washing machine with lukewarm water and regular liquid detergent. Tumble dry on low.

Voila! Good as new!

Spandex Tablecover Clean of Oil Stain

If you’re interested in a quote for any of our colours and sizes of spandex tablecovers:

Comments (0)
How to Replace the Locking Pin (Cotter Pin) on a Folding Cocktail Table

The most common problem that folding cocktail tables have is the spring inside the locking pin will break – making it impossible for the table to be properly locked into a setup position. This causes a stability issue with the tables that rental companies, hotels, banquet halls and golf courses obviously want to avoid. We have the locking cotter pins in stock should this happen to you and have documented in the below post how to go about replacing the locking pin (cotter pin) on your folding cocktail table.

The locking cotter pin is comprised of three parts: the pin itself (A), the spring (B) and the ring (C).

Locking Cotter Pin Parts

You will need to remove the damaged locking pin by folding up the table and then removing the ring from the pin. This will allow you to slide out the pin with broken spring to the left out of the hole.

Here is what a new pin will look like when you receive it.

Cotter Pin Assembled

In order to install the pin, you need to remove the ring from the pin – similar to removing a key from a keyring.

Cotter Pin Ring Removed

To install the new cotter pin, slide the spring and pin into the hole of the folding cocktail table. The spring should be between the hole and pin with the pin’s eye on the right.

Cotter Pin Inserted

To get it working properly, you need to push and use your strength to hold the pin + spring in so that the pin’s eye is showing on the right side of the leg.

Cotter Pin Inserted

From here, you will put the ring on through the eye. I just put it on a little bit so the cotter pin wouldn’t shoot out to the left.

Cotter Pin Inserting Ring

This allowed me to use both hands to put the ring fully on.

Assembled Cotter Pin

There you have it – a fully locking cotter pin for your folding cocktail table.

Fully Locking Cotter Pin

If you’re interested in more industry news like this follow us on Twitter, Facebook, LinkedIn, or Google+.

Comments (0)
How far apart should rows of plastic folding chairs be?

We always like questions on how to use our products. They’re a great way to find out more about how our products should be used in their intended. Over the past two weeks we have shared the answer to the reader questions “how far apart should rows of chiavari chairs be?” and “how far apart should rows of white resin folding chairs be?” We've also had a reader ask “how far apart should rows of plastic folding chairs be?” and I thought it worth sharing the answer. From a guest’s point of view, having chair rows too close together can be uncomfortable. I know I have attended many hockey and baseball games where the stadiums cram rows of seating in and going to get a drink or to the restroom is an awkward experience to say the least. On the flip side of this, if chairs are spaced too far apart, guests won’t be able to adequately interact with one another and the room feels like there is wasted space.

The rule of thumb for how far apart rows of plastic folding chairs: 33.25 inches from chair back to chair back.

Our Plastic Folding Chairs are 15.25 inches deep. We need to leave an additional 18 inches between the back of the chair row in front to the plastic folding chair front of the row behind.

How Far Apart Should Rows of Plastic Folding Chairs Be

The rule of thumb for how far apart each plastic folding chair should be in a row: each plastic folding chair in a row should be spaced 2 inches apart so guests don’t feel crowded or uncomfortable.

Find out more tips like this, and industry articles by following us on Twitter, Facebook, LinkedIn, or Google+.

Comments (0)
How to Assemble a Folding Bar Chair Cart

What you should receive:

  • (4x) Swiveling and Locking Wheels
  • (1x) Main Handle
  • (2x) Mid/End Handle
  • (1x) Base Cart Unit
  • (16x) Hex Bolts – 1/2 inch
  • (16x) Nut – 1/2 inch
  • (32x) Steel Washer
  • (4x) Bolt – Hex Key
  • (4x) Nut – 10mm
  • (2x) Bolt Long – Hex Key
  • (2x) Steel Plate
  • (2x) Two Sided Wrench
  • (1x) Hex Key

Recommended Tools (Not Included, Not required)

  • ½ inch Wrench (or Ratchet)

folding-bar-chair-cart-box

Step 1:
First unpack the box to ensure you have received all of the parts. The master pack will include a box inside containing the wheels, bolts and washers, two wrenches, along with the handles and base cart unit. (If you haven’t received all the parts, please let us know by calling 1-800-827-8953 or contacting sales@nationaleventsupply.com). Once this has been confirmed you can start to assemble the cart.

folding bar chair cart part list

folding bar chair cart open box

Step 2:

Flip the cart over so that the flat side is facing up, this is the bottom of the cart. Place the weeks over the predrilled holes. Note that all of the wheels are identical so you do not need to worry about which wheel goes on the forward or back position of the cart. *Important – Ensure that the head of the bolt is facing the wheel like pictured*

folding bar chair cart close up on wheel with bolt

folding bar chair cart with bolt tightened

folding bar chair cart wheel assembled

folding bar chair cart bottom of cart

Step 3:
Flip the cart upright.

folding bar chair cart upright

Step 4:
Place the main handle at the end of the cart, top should bend away from the body of the cart so your hands can safely hold the handle while the cart is loaded. Note the main handle will only fit on one end of the cart. Attached the steel place/support bracket with the dimbled hole on the handle. Use the long bolt to attached the bracket to the handle, use the supplied wrench and hex key to tighten bolt.

folding bar chair cart assembly of support for handle

folding bar chair cart assembly of handle part 2

folding bar chair cart assembly of handle part 3

Step 5:
Use the short bolt to attach the bottom of the support bracket to the cart.

folding bar chair cart assembly of handle part 4

Step 6:
Use the two remaining bolts to secure the handle at the base.

folding bar chair cart handle bottom bolt

folding bar chair cart assembly of handle part 6

Step 7:

Place divider handles in provided slots.

folding bar chair cart divider handle inserted

You're all set and ready to load your folding bar chairs with 4, 8, 10 or 20 chairs!

folding bar chair cart with 4 chairs

folding bar chair cart with 8 chairs

folding bar chair cart with 10 chairs

folding bar chair cart with 20 chairs

If you’re interested in receiving a quote for our folding bar chairs or for our folding bar chair cart:

Comments (0)
How Strong is a 6 Foot Rectangular Wood Folding Table?

We often get asked how strong our tables are. Everyone is scared of getting a table that's not strong enough or that will collapse in a strong breeze. In the past, we've stress tested our plastic folding tables, showing what it takes to break a 6-ft Rectangular Plastic Folding Table, an 8-ft rectangular plastic folding table, and a 60-inch Round plastic folding table. Unfortunately, after stress testing our 8-ft wood folding table, last year's winter got really bad and we had to use our road salt to melt ice instead of breaking wood tables. But winter's back again, we've got a couple of skids of salt, and a desire to stress some tables!

Our first stress test is going to be the 6-ft wood rectangle folding table. Want to know how much salt it takes to break the table? Watch on!

Now that you've seen what it takes to destroy one of our 6-ft Wood Folding Table, why not:


Comments (0)