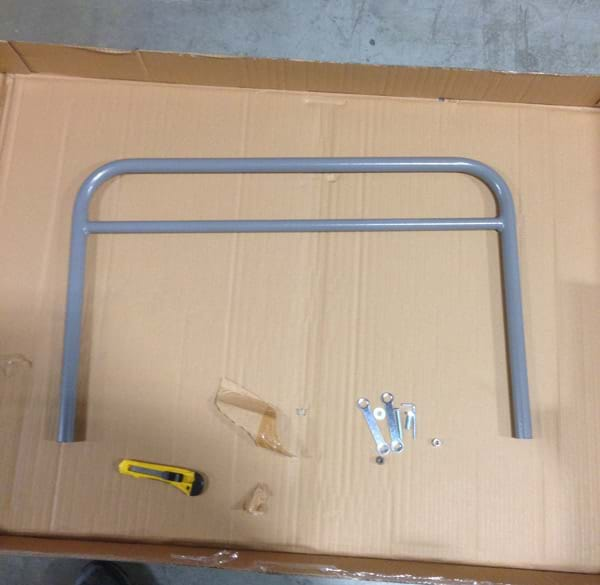
You will notice before purchasing our NES Round Table Cart that this product does require some assembly. These instructions will walk you through the assembly of the cart itself including what parts you should receive and what tools are and are not required. Below is what the Round Table Cart will look like when you first receive it.

What you should receive:
- (1x) Base Cart
- (4x) Swivel Wheel with brake
- (2x) Enclosure Pole
- (1x) Handle
- (16x) 1 1/4” Bolt
- (16x) Steel Nut
- (32x) Steel Washer
- (12x) 2” Bolt
- (12x) Gray Nut
- (1x) Belt
Tools Required (not included):
- Utility Knife or Scissors
- Socket Ratchet
- ½ inch 6 point socket

- 3” extension
- Hex key (included)
- Wrench (included)
Here’s what it will look like upon opening the box up and removing the base:

Stand the Cart base up on its side in order to make it easier to put the wheels on.

There is a rectangular box in the middle of the box – this contains the wheels, hardware and belt.

Step 1: Cut open the rectangular box with the utlility knife and take out the bag of hardware. Make sure to double check you have the full number of bolts, washers and nuts as well as the proper tools. If you do not, please contact National Event Supply customer service at 1-800-827-8953 or sales@nationaleventsupply.com.

Step 2: Take 1 wheel out of the box, and put 1 washer onto 1x 1 ¼” bolt. Repeat with 3 more 1 ¼” bolts for a total of 4 bolts with 1 washer on each.

Step 3: Put each bolt and washer set into each hole of one wheel – then put wheel with bolts / washers through the holes at one of the four corners on the bottom of the cart base (the flat side). It does not matter where each wheel goes.

Step 4: On the top of cart, attach a washer and then steel nut. Tighten with your hand until you can’t anymore.

Step 5: Repeat step 4 with the remaining 3 bolts to hold the wheel loosely on the base of the cart.

Step 6: With the wrench provided and your ratchet with ½ inch socket plus 3” extension fastened together, attach the wrench to the bolt head and the ratchet to the steel nut. Ratchet all 4 nuts until the wheel is tight to the base of the cart.

Step 7: Repeat steps 2 – 6 on the remaining 3 wheels.

Step 8: Put the cart on its wheels and put the two enclosure poles in each of the holes.

Be careful to double check that you are putting the pole with the flat bar at the cart end that has a 2” space before the end of cart. The below 2 pictures show the difference in ends – one has a gap and one does not.


Step 9: Pick up 1x 2” bolts and 1x grey nuts. Starting on one pole, push down and put the bolt through the top hole – with the bolt head facing towards the side of the cart. Screw the grey nut on.

Step 10: Take the hex key and put it into the bolt head and hold it with one hand. Using your other hand, screw on the nut. Repeat step 9 and 10 on the remaining 3 corner sections where the pole meets the cart.

Step 11: Now we need to connect the middle poles (circled in the photo below) on either side of the cart to the base of the cart.

You will need 2 x 2” bolt and 2x grey bolts. The bolt holes may not initially line up but you just need to maneouver the middle bar into place and put the 2 bolts in (with the bolt head facing you).


Step 12: Using your hex key again, put it into the bolt head and use one hand to hold the hex key while you use the other hand to screw the grey bolt onto the bottom of the bolt. Repeat on both bolts until nut is tight. Repeat step 12 on the other middle pole.

Step 13: You will see 1 remaining part left – the handle of the cart. There’s a side that has holes and a side that does not (see below pictures).


Place the handle (hole side down) in the 2 holes at the top part of the straight enclosure poles.

Step 14: There are two locking pins on either side of the handle that allow you to adjust the space depending on if you’re storing 4ft, ft or 6ft round tables. Using your hand pull down on the locking clip and use your body to push one side of the handle in.

Do the same on the other side – pulling down on the locking pin and using yoiur body to push the handle in.

Your cart is almost complete! The below three photos show the handle position when storing a 4ft round;

5 foot round;

And 6ft round tables.

Step 15: The last thing to do is to attach the belt that is used whenever you’re transporting less than a full cart load of tables. This belt can be hooked in one of the many holes on the cart enclosure poles and handle to make sure the tables don’t flow all over in the cart. The belt can also be extended to make a tighter or looser fit.


There you go. All set to transport your round folding tables.


If you’re interested in a quote for any of our chair covers: