Call Us Toll Free: 1-800-827-8953
Close
(0)
You have no items in your shopping cart.
Search
Filters
RSS

Blog posts tagged with 'event venues'

Do Bar-Height Folding Chairs work with Tall Cocktail Tables?

Tall cocktail tables are an event staple if there’s going to be a standing cocktail reception involved. They're a great addition to allow guests to put down their appetizers and beverages to give their hands a break, shake hands with new networking contacts or express they’re finished with their plates. Lately we've been getting asked about our bar-height folding chairs and whether they work well with tall cocktail tables. These chairs have the following dimensions from floor to seat:

Bar Height Folding Chair with Measurements

A 24-inch Tall Cruiser Table, 30-inch Tall Cruiser Table & 36-inch Tall Cruiser Table all have the below dimensions from floor to tabletop:

24-Inch Top with Tall Pole Measurements
30-Inch Top with Tall Pole Measurements


36-inch Top with Tall Pole Measurements

A Folding Pedestal Table has the below dimensions from floor to tabletop:

Folding Pedestal Table Measurements

A tall folding cocktail table has the below dimensions from floor to tabletop:

Tall Folding Cocktail Table

Because the clearance space between the Folding Bar Chair's seat and the tabletop is between 13 3/8" – 14 5/8" depending on which cocktail table used, all of the tall cocktail tables mentioned are perfectly compatible with the folding bar stools.

If you’re interested in receiving a quote for our 24" Tall Cruiser Table, 30" Tall Cruiser Table, 36" Tall Cruiser Table or Tall Folding Cocktail Table:


How to Assemble a Folding Pedestal Table

While I’d like to say our NES Folding Pedestal Table is really easy to assemble and disassemble – if you’ve never done it before it can take a few scratches of your head before you figure it out. I thought because it took me a couple fumbling embarrassing seconds to figure it out I would write a how to post to talk through how to assemble a folding pedestal table.

What an unassembled Folding Pedestal Table will look like in box

Folding Pedestal Table

Step 1:

Remove table top from on top of base and identify which two tabletop clips have sides and which two clips has one side missing

Folding Pedestal Tabletop Underneath

Step 2:

Identify which two pedestal legs do not move and remain stationary.

Moving Folding Pedestal Table Legs

Step 3:

Line the two clips with sides on top of the two pedestal legs that do not move.

Folding Pedestal Table-Step3

Step 4:

Press down on each side of the tabletop on top of each leg until each leg snaps into the clip.

Folding Pedestal Table Clipped In

Step 5:

Taking one of the legs that moves, slide the leg towards the clip with no sides and press the leg firmly into the clip.

Clipping 1 of 2 Folding Pedestal Table Leg

Step 6:

Take the last leg and slide the leg toward the clip with no sides, pressing the leg firmly into the clip.

Clipping 2 of 2 Folding Pedestal Table Leg

Voila. Your Folding Pedestal Table is now assembled!

If you’re interested in obtaining a quote on our NES Folding Pedestal Tables including shipping to your location:


How to Assemble a Cruiser Table

You will notice before purchasing our NES Wood Cruiser Tables that this product does require some assembly. What does some assembly mean in this case? To find out, this blog post will walk you through the assembly of an NES Wood Cruiser Table (Hint: There is very little assembly required!). These steps can be replicated on any size pole height and any size table top we own.

What you should receive:

  • (1x) Wood Table Top (24", 30" or 36")
  • (1x) Pole (30" tall or 42" tall)
  • (1x) Table Base (includes 4 screw in adjustable cruiser table feet)
  • (1x) Connector
  • (6x) Screws

Tools Required (not included):

  • Phillips Screwdriver
  • Tape measure
  • Pencil

Step 1:

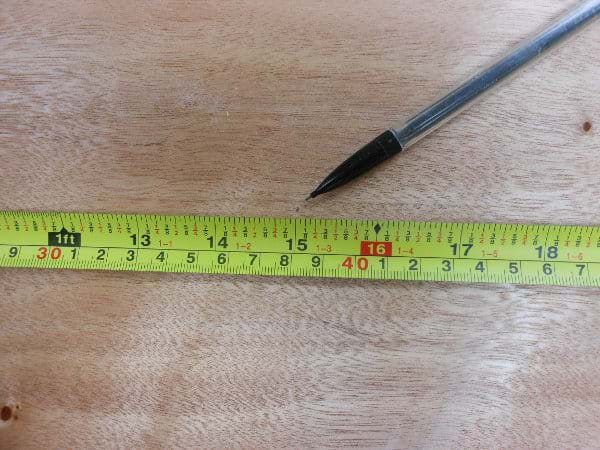
First, using your measuring tape, measure across the bottom of the table tabletop (the bottom is not clear coated). With the pencil make a mark in the center of the table.

Measuring for Centre-Wide Shot Measuring for Centre-Zoomed

Step 2:

Turn the tape measure 90 degrees and mark the half-way point again. These points are not likely to line up perfectly but this will give you the approximate center of your table.

Measuring for Centre 2-Wide Shot Measuring for Centre 2-Zoom

Step 3:

Take your connector and place it so the center of the connector is over the two center marks that you made in step 1 and step 2.

Placing Connector

Step 4:

Screw the connector onto the bottom of the table, hold the connector firmly in place to prevent any movement. We also recommend that you start all of the screws before tightening them down.

Starting Screws Tightening Screws

Step 5:

Place the pole on the table base, note that the side with two slots cut into the pole should be pointing up.

Putting Pole in Base Pole in Base

Step 6:

Place the table top and connector onto the pole; rotate the top until the connector slides into the slots on the pole.

Rotate on Pole

Step 7:

Use and enjoy your fully assembled cocktail table! You will also note that it can be easily broken down into three pieces for easy transportation (Pole, Base, Top with connector attached).

Assembled Table

If you’re in the market for cruiser tables, and would like to pricing including shipping to your location:


How to use a Cocktail Plate

One of the biggest struggles when attending a cocktail reception is the awkwardness of juggling a wine glass and plate of appetizers. It pretty much means foregoing either the wine or the appetizers or the entire attendee pool clusters around the food stations and cruiser tables so they have places to set their plates or glasses. What if you could offer your customers a solution to this problem?

Cocktail PlateEnter the Cocktail Plate.

This nifty plate allows for guests to hold their crystal wine glass and appetizer plate in one hand enabling them to freely use the other hand to shake hands of newly acquainted guests or use gestures to properly illustrate their story.

One of the questions we get asked most is "How do you use a cocktail plate?"

The answer lies ahead.

Imagine you’ve just arrived at a party and after some preliminary circling have headed for the bar to imbibe in a fabulous Chardonnay.

Step 1: Pick up fabulous Chardonnay

Stemmed Wine Glass

In order to make sure you behave professionally and alcohol doesn’t cloud your judgement, you’re going to want to have something to eat. So you head to the food stations to pick up some food.

Step 2: Pick up appetizers

Cocktail Plate with Appetizers

By now you have two hands full and none available to network with. Here’s where the cocktail plate really shines.

Step 3: Place stem of wine glass in ‘c’ indent of cocktail plate and let wine glass rest on plate

Using a Cocktail Plate

Voila! One hand free to shake hands with everyone in the room!

A note of caution: This cocktail plate really shines when you’re mixing and mingling standing up – just be careful that you remove your wine glass BEFORE placing your plate down on a table. If you forget this, you’ll have a glass of wine all over yourself, the table or both.

Cocktail Plate Wine Glass Falling Over

Your customers will love being able to rent a plate like this that helps solve a common networking problem.

If you’re interested in receiving a custom quote for these cocktail plates including shipping to your location:


How to Touch Up a Resin Chiavari Chair

Gold Chiavari ChairWhile our resin Chiavari chairs are more durable than wood Chiavari chairs, they will still scratch with use over your years of ownership. With some trial and error we have developed a technique that yields great results when touching up your NES Reliable Resin Chiavari Chairs. Here are some easy to follow, step by step instructions that you can follow when doing your touch ups to help keep your chairs in the best condition possible.

Tools and Supplies:

  • Small Area Sanding Sponge, 120 Grit
  • Tack Cloth
  • Spray Paint
  • Cardboard or Drop Cloth

*please follow all instructions on spray paint and only paint in an open well-ventilated area*

Step 1:

Set up your cardboard or drop cloth in a well-ventilated area. Remember you are using spray paint so consider the direction that you are spraying. For example, if you are planning to do this outside, keep in mind the direction of the wind.

Step 2:

Use the small area sanding sponge to lightly sand the scratches. You are not looking to get rid of all the paint, you are just looking to knock down any sharp edges or ridges that may have been created from the scratch.

Step 3:

Wipe the area you are going to paint with a tack cloth to remove any dust that may have been left from sanding. This will give you a cleaner work surface to apply the paint to, helping to reduce the chance of having an uneven paint coat.

Step 4:

Be sure to shake your spray paint well before using. If the spray paint has been used before, be sure to clean the spray nozzle prior to painting to prevent uneven spray. Follow the application instructions on the spray paint can, generally this means just a few light coats 1-2 minutes apart. Let dry for 24 hours and reapply if required.

If you are interested in finding out what spray paint will work best for the NES Reliable Resin Chiavari Chairs that you purchased from National Event Supply please contact us for details.